volumizing mascara Guide: Pro Tips for Dramatic, Clump-Free Lashes
If you want bold, fluffy lashes without the “spider leg” effect, the right volumizing mascara and a few smart techniques can completely transform your look. Volumizing formulas are designed to make lashes look thicker and fuller at the base and along the length, but the difference between plush and clumpy often comes down to application and product choice.
This guide walks you through everything you need to know: how volumizing mascaras work, how to pick the best one for your lashes, and pro application tricks for dramatic yet clean results.
What Makes a Mascara “Volumizing”?
Volumizing mascara is specifically formulated to make lashes look denser and more abundant, not just darker or longer. It does this through a combination of:
- Thickening waxes and polymers that coat each lash to visually increase diameter
- Pigments (usually black or brown iron oxides) that create depth and intensity
- Fibers or micro-particles (in some formulas) that add bulk and grip to the lashes
- Brush designs that deposit more product at the base for a fuller lash line
Compared to lengthening mascaras, volumizing formulas tend to be creamier and slightly thicker. This is great for impact, but it also means they can clump more easily if you don’t prep the lashes or layer carefully.
How to Choose the Best Volumizing Mascara for Your Lash Type
Not all lashes are the same, and your ideal volumizing mascara depends on your natural texture, length, and eye shape.
1. For Short Lashes
Look for:
- Smaller, tapered brushes that can reach tiny lashes in the inner and outer corners
- Tubing or fiber formulas that add dimension without requiring many coats
- Ultra-black pigment to maximize definition
Avoid:
- Oversized, fluffy brushes that overwhelm short lashes and smear onto your lid.
2. For Sparse or Thin Lashes
Look for:
- Soft, buildable formulas that let you layer 2–3 coats without turning crunchy
- Nourishing ingredients like panthenol, biotinoyl tripeptide, or castor oil derivatives for conditioning
- Brushes with densely packed bristles to grip every lash
Avoid:
- Very dry formulas that can flake and make lashes look even more sparse.
3. For Straight Lashes That Won’t Hold a Curl
Look for:
- Waterproof or water-resistant volumizing mascara: these tend to hold curl better because they’re less wet and set more firmly
- Lightweight volumizing formulas that won’t weigh lashes down
Avoid:
- Very wet, heavy mascaras that immediately drop your curl.
4. For Naturally Full Lashes
Look for:
- Volumizing + separating mascaras with comb-like or molded plastic wands
- Smudge-proof formulas if your lashes touch your brow bone
Avoid:
- Overly thick brushes and super wet formulas that can clump a naturally dense lash line.
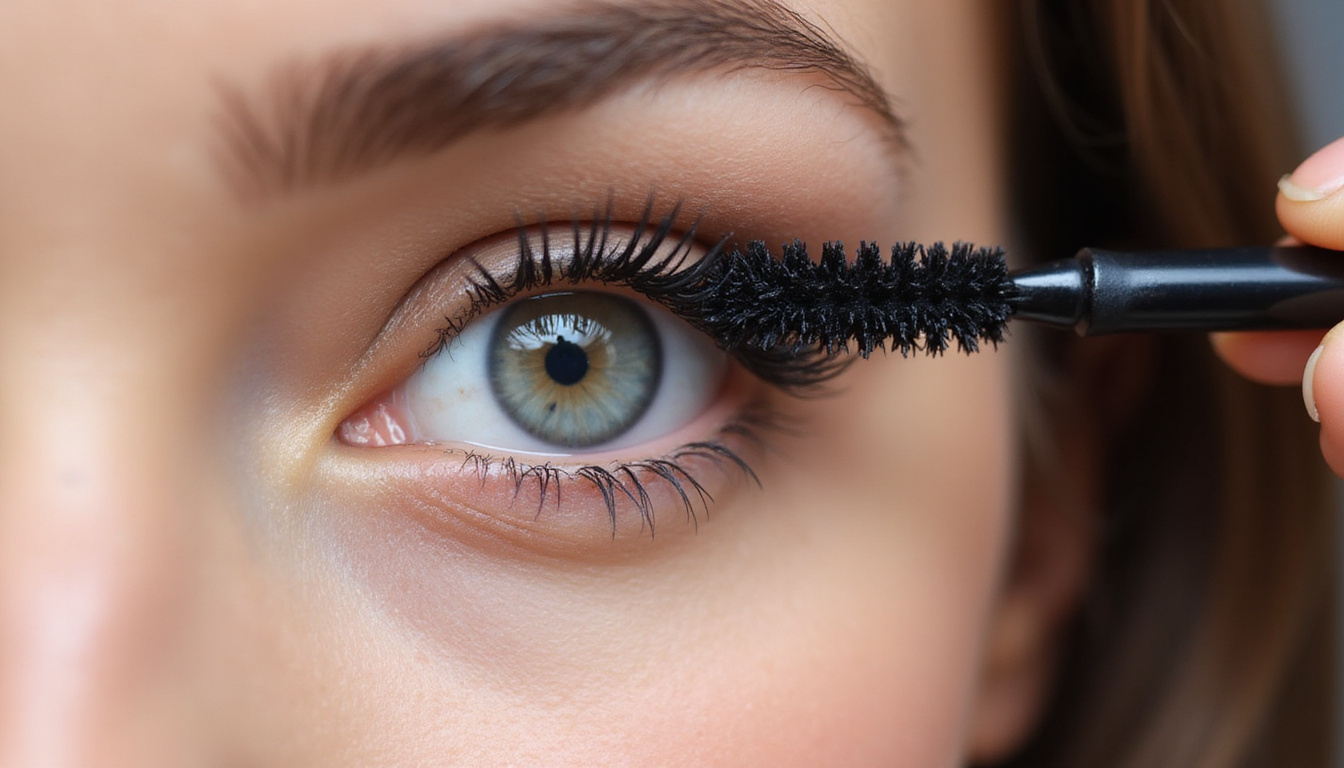
Decoding Mascara Wands: Why the Brush Matters
The wand is almost as important as the formula when it comes to volumizing mascara. Different shapes dramatically change your results.
-
Classic fat, fluffy brushes
Best for: Thick, medium-to-long lashes
Effect: Maximum bulk and volume; can clump on fine or short lashes. -
Hourglass-shaped brushes
Best for: Creating a lifted, fanned-out effect
Effect: Concentrates volume in the center lashes for a wide-eyed look. -
Tapered or cone-shaped brushes
Best for: Reaching tiny inner and outer corner lashes
Effect: Targeted volume and control. -
Rubber or plastic comb wands
Best for: Those prone to clumps
Effect: Clean, separated volume with good definition. -
Curved brushes
Best for: Straight lashes that need a lift
Effect: Helps push lashes upward while coating them.
If you love a formula but hate its brush, save a favorite wand from an old tube (wash it thoroughly) and use it to apply your new volumizing mascara. This simple swap can completely change how a product performs.
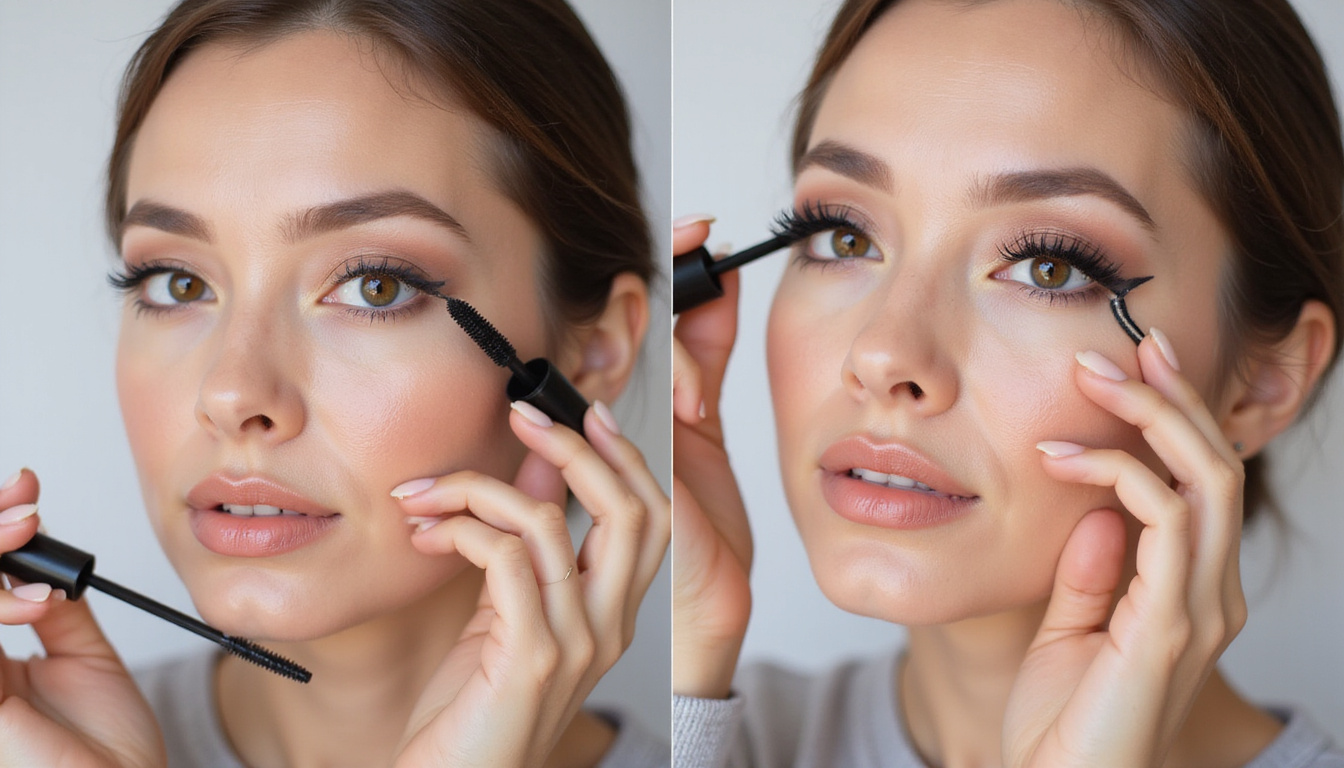
Step-by-Step: How to Apply Volumizing Mascara for Maximum Volume, Zero Clumps
Step 1: Start with Clean, Dry Lashes
Remove all traces of old mascara and oil-based makeup. Residue can:
- Cause clumping
- Make mascara flake
- Weaken natural lashes over time
A gentle, dedicated eye makeup remover is ideal, especially for waterproof products.
Step 2: Curl Your Lashes (Before Mascara)
For most people, curling is the single most impactful step. Volumizing mascara looks more dramatic on lifted lashes because it exposes the full length.
Tips:
- Use a clean, good-quality lash curler.
- Start at the base, gently pulse for 5–10 seconds.
- Move slightly outward and repeat to create a smooth curve instead of a hard “L” bend.
Step 3: Apply a Lash Primer (Optional but Powerful)
A volumizing lash primer can dramatically boost thickness and help prevent smudging and flaking. Primers typically:
- Add grip and structure to lashes
- Fill in sparse areas
- Create a “scaffolding” for your volumizing mascara
Apply a thin, even coat, and let it dry just slightly (still a bit tacky) before mascara.
Step 4: Load the Wand Properly
- Do not pump the wand in and out of the tube—this pushes in air and dries out the mascara faster.
- Instead, twist the wand as you pull it out to pick up product.
- If there’s excess globbed on the tip, wipe it on a tissue or the rim before applying.
Step 5: The Wiggle-and-Pull Technique
This is the key to thick, yet separated lashes:
- Place the wand at the base of your lashes.
- Wiggle it side to side to deposit most of the product at the roots.
- Slowly glide upward to the tips, keeping the wand slightly wiggling.
- Repeat 1–2 times per eye, focusing on the base for volume rather than overloading the tips.
For extra drama, do a light second coat before the first fully dries—this helps the layers fuse together instead of clumping.
Step 6: Detail Work for Outer and Lower Lashes
- Use the tip of the wand to coat outer corner lashes for a cat-eye effect.
- For lower lashes, switch to a clean spoolie or the very tip of the wand, held vertically, to avoid smears.
Step 7: Comb Through to De-Clump
Before the mascara sets fully:
- Use a clean lash comb or spoolie to separate any lashes sticking together.
- Focus on the center and outer corners where clumps are most visible.
This simple step can turn a heavy, almost ruined application into fluffy, editorial-style lashes.
Common Volumizing Mascara Mistakes (and How to Fix Them)
Even the best volumizing mascara can look messy if applied incorrectly. Here are frequent pitfalls and their fixes:
-
Too Many Layers
- Symptom: Crusty, spidery lashes
- Fix: Stick to 1–3 light coats, applied while the previous coat is still slightly tacky.
-
Using Very Old Mascara
- Symptom: Flaking, dryness, clumps that won’t separate
- Fix: Replace mascara every 3–6 months; old formulas are more likely to harbor bacteria and irritate eyes (source: American Academy of Ophthalmology).
-
Skipping the Lash Comb
- Symptom: Heavy, stuck-together lashes
- Fix: Keep a metal lash comb or disposable spoolies in your kit and use them while mascara is still soft.
-
Layering Too Many Different Formulas
- Symptom: Smudging, flaking, unpredictability
- Fix: If cocktailing, keep it simple: for example, one lengthening mascara as a base, then a volumizing mascara on the mid-lengths and tips.
-
Applying Mascara After Setting Spray or Cream Products
- Symptom: Transfer and smears on lids
- Fix: Finish all creams and sprays first, then apply mascara as your last eye step.
How to Avoid Smudging and Flaking with Volumizing Mascara
Big volume isn’t worth it if you end the day with raccoon eyes. To keep your volumizing mascara clean and long-lasting:
- Degrease the eye area lightly with a bit of micellar water on a cotton swab before makeup if you have oily lids.
- Use an eyeshadow primer on the lid if transfer is a problem.
- For downturned or hooded eyes, consider a waterproof or tubing voluminizing formula on upper lashes.
- Avoid heavy creams right on the lash line; keep thick eye creams to nighttime.
If you do notice smudging during the day, gently dab (don’t rub) the area with a cotton bud and a tiny amount of micellar water or a pointed makeup sponge.
Removing Volumizing Mascara Without Damaging Your Lashes
One of the biggest lash-killers is rough removal, especially with waterproof or high-grip volumizing mascara.
Use this gentle method:
- Soak a cotton pad with a bi-phase (oil + water) eye makeup remover or gentle cleansing oil.
- Press the pad over your closed eye for 15–20 seconds to dissolve the formula.
- Wipe downward, not back and forth, to avoid rubbing lashes against the skin.
- Use a cotton bud along the lash line to remove any remaining pigment.
Avoid tugging or picking at mascara flakes. Consistently rough removal can lead to lash breakage and thinning over time.
When to Replace Your Volumizing Mascara
For both performance and eye health, it’s important not to hang onto a tube too long. General guidelines:
- Everyday use: Replace every 3 months.
- Occasional use: Replace every 6 months or sooner if texture or smell changes.
- After an eye infection: Discard immediately and replace with a fresh tube once your doctor clears you.
If your formerly smooth volumizing mascara suddenly becomes thick, dry, or smells off, it’s time to let it go.
Quick Comparison: Volumizing vs. Lengthening vs. Curling Mascara
To build the perfect lash wardrobe, it helps to know what each type offers:
-
Volumizing Mascara
- Goal: Thickness, density, dramatic impact
- Best for: Evening looks, bold eyes, sparse or thin lashes
-
Lengthening Mascara
- Goal: Extend visible lash length
- Best for: Short lashes, natural but enhanced daytime looks
-
Curling/Lifting Mascara
- Goal: Hold a curl, open up the eye
- Best for: Straight lashes that droop easily
Many modern formulas combine these benefits (e.g., volumizing + lengthening), but if you have a specific lash concern, choosing a targeted formula or layering strategically can give you the best results.
FAQ: Volumizing Mascara and Full, Fluffy Lashes
Q1: How do I choose the best mascara for volume without clumps?
Look for a volumizing mascara with a buildable formula and a brush that suits your lash type—rubber or comb-style wands are great for those prone to clumping. Avoid pumping the wand in the tube, apply 1–2 light coats while still tacky, and always comb through with a clean spoolie to maintain separation.
Q2: Can I use a lash serum with my mascara for volumizing results?
Yes. A lash serum and volumizing mascara can work very well together. Use the serum on clean lashes at night to support the appearance of length and fullness over time, and reserve the mascara for daytime cosmetic volume. Make sure the serum is fully dry before applying any makeup to avoid interference with mascara performance.
Q3: What’s the difference between a thickening and volumizing lash product?
Most brands use thickening mascara and volumizing mascara interchangeably. Both aim to make lashes look fuller by adding bulk to each hair. The distinction is mostly marketing; focus instead on formula reviews, wand design, and how well it layers for your specific lashes.
Bring Your Lash Game to the Next Level
Mastering volumizing mascara is less about chasing the newest launch and more about understanding your lashes, choosing the right brush and formula, and applying with intention. With proper curling, strategic layering, and a quick comb-through, you can achieve dramatic, clump-free lashes that frame your eyes beautifully all day.
If you’re ready to upgrade your routine, start by reassessing your current mascara:
- Does the wand truly suit your lash type?
- Are you replacing it often enough?
- Have you tried applying with the wiggle-and-pull and combing techniques?
Experiment with one or two new volumizing mascaras that match your needs, then apply the pro tips from this guide. With just a bit of practice, your lashes can look as full and striking as any campaign photo—without falsies or extensions.
For More Visit Us : Hypeladies - Empowering Lifestyle Advice


Comments
Post a Comment