Luminous foundation Hacks for Instantly Dewy, Flawless Skin
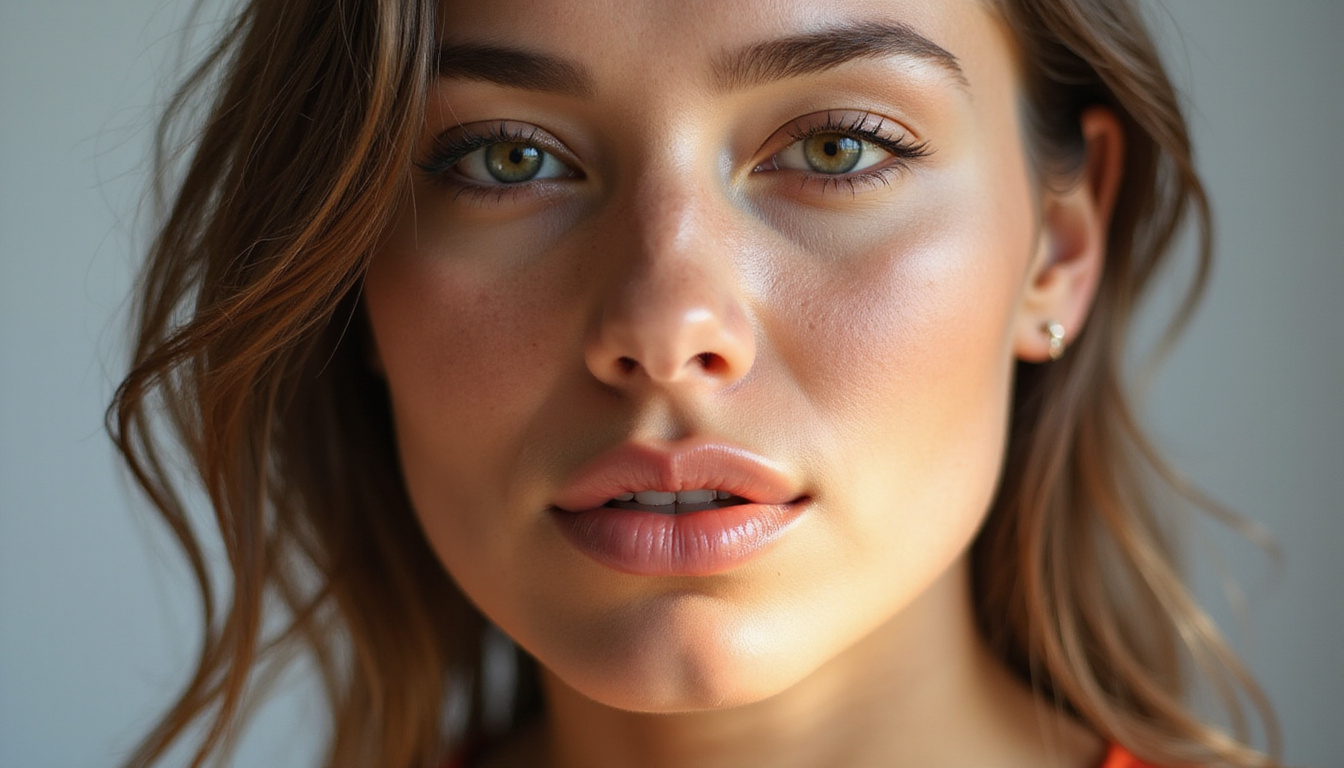
If your makeup goals include fresh, lit‑from‑within radiance instead of flat, mask‑like coverage, mastering luminous foundation is the way to go. The right techniques can transform even a basic base product into a glow‑boosting, skin‑like finish that looks stunning in real life and in photos. This guide breaks down simple, pro‑inspired hacks that work whether you’re oily, dry, or somewhere in between.
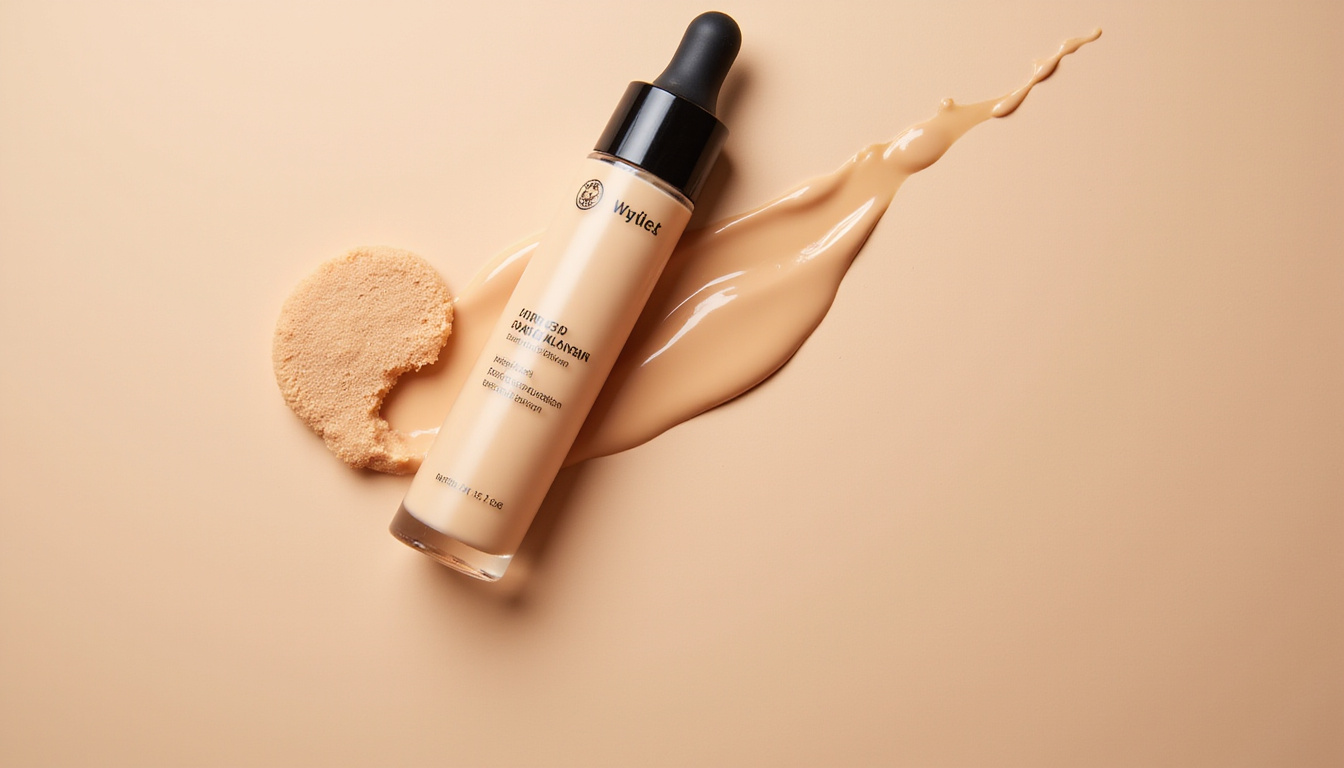
What Makes a Foundation “Luminous”?
Before diving into hacks, it helps to understand what actually creates that luminous effect.
Luminous foundations are typically:
- Light‑reflective (using fine mica or soft‑focus pigments)
- Hydrating (often with glycerin, hyaluronic acid, or skincare ingredients)
- Sheer‑to‑medium coverage (to let real skin peek through)
Unlike matte formulas designed to absorb oil and reduce shine, luminous foundation mimics the way healthy skin reflects light: soft, diffused, and dimensional instead of greasy or glittery.
Step 1: Skin Prep That Supercharges Your Glow
Even the best luminous foundation won’t look flawless if it sits on dry patches or very oily, unbalanced skin. The right prep is non‑negotiable.
For Dry or Dehydrated Skin
-
Gentle exfoliation
Use a mild chemical exfoliant 2–3 times per week to smooth texture so foundation glides on evenly. -
Hydrating layers
- Mist or essence
- Lightweight hydrating serum (like hyaluronic acid)
- Nourishing moisturizer
-
Radiance‑boosting primer
Apply a dewy, illuminating primer to high points of the face for an under‑glow that shines through foundation.
For Oily or Combination Skin
-
Balance, don’t strip
Use a gentle, pH‑balanced cleanser and a lightweight, non‑comedogenic moisturizer. Over‑drying can cause more oil production. -
Targeted priming
- Mattifying primer on T‑zone
- Luminous or hydrating primer on outer parts of the face and high points
-
Optional: Skin‑smoothing serum
Niacinamide serums can help refine pores and control excess oil over time (source: American Academy of Dermatology).
Prepped, balanced skin allows luminous foundation to look glossy and healthy instead of patchy or overly shiny.
Step 2: Pick the Right Luminous Foundation for Your Skin Type
Not all glow formulas are created equal. Choose a luminous foundation that matches your skin needs and lifestyle.
For Dry Skin
Look for:
- Descriptors like “hydrating,” “moisturizing,” “radiant”
- Cream or liquid textures
- Ingredients such as glycerin, squalane, hyaluronic acid
These formulas keep skin comfortable and prevent the foundation from catching on dry spots.
For Normal to Combination Skin
Choose:
- “Natural glow” or “satin luminous” foundations
- Medium coverage that can be sheered out or built up
- Flexible wear that doesn’t slide off oily areas
Balance is key: not too matte, not overly dewy.
For Oily Skin
You can still wear luminous foundation, but be strategic:
- Look for “natural finish” or “soft glow” rather than “ultra‑dewy”
- Opt for oil‑free, long‑wear formulas
- Use the smallest amount necessary and pair with targeted powder
Think semi‑luminous: glow where you want it, control where you don’t.
Step 3: Application Hacks for a Seamless, Dewy Finish
How you apply luminous foundation can completely change how it looks.
Hack 1: Cocktail with Skincare
For ultra‑natural, dewy days, mix a pump of luminous foundation with your moisturizer or hydrating primer on the back of your hand. This:
- Sheers out coverage
- Boosts hydration
- Gives a “my skin but better” veil of radiance
Ideal for daytime, no‑makeup‑makeup, or mature skin that looks best with softer coverage.
Hack 2: Use Less Product, More Strategically
Instead of spreading a thick layer all over, apply luminous foundation only where you actually need it:
- Center of the face (around nose, chin, and between brows)
- Areas of discoloration or redness
Then blend outward with:
- A damp sponge for the softest, most diffused glow
- A dense brush for more coverage with a still‑radiant finish
- Clean fingers for a super skin‑like effect
Leaving the outer perimeter of your face almost bare keeps the look fresh and believable.
Hack 3: Layer Thin Coats
Build coverage in thin, flexible layers:
- Apply a sheer first layer and blend well.
- Add tiny amounts only to areas that need extra correction.
- Let each layer sit for a few seconds before adding more.
Thin layers dry and meld into the skin better, reducing cakiness and preserving luminosity.
Step 4: Strategic Concealing (Instead of More Foundation)
Stacking more luminous foundation to cover dark circles, redness, or blemishes can lead to creasing and excess shine.
Try this instead:
- Use a creamy concealer only where needed.
- Apply after your thin base of luminous foundation.
- Tap in with your fingertip or a small brush until it melts seamlessly into the skin.
Spot correcting prevents your overall glow from turning into a heavy, makeup‑y mask.
Step 5: Set Without Killing the Glow
Powder can make or break your luminous foundation look. Over‑powdering turns radiance into flatness, but skipping it entirely can mean creasing or sliding.
How to Set Luminous Foundation the Smart Way
-
Choose a fine, translucent powder
Finely milled, lightweight formulas blur without looking chalky. -
Powder selectively
Set only:- Sides of the nose
- Smile lines
- Under‑eyes
- Center of the forehead and chin (if you get shiny)
-
Leave the high points bare
Cheekbones, temples, bridge of the nose, and cupid’s bow can stay mostly powder‑free for maximum glow.
Use a small, fluffy brush to place powder exactly where you want it instead of sweeping it all over.
Step 6: Amplify the Glow With Highlighter and Cream Products
Luminous foundation provides a radiant base, but the real magic happens when you layer compatible products on top.
Cream and Liquid Products Are Your Friends
Pair your luminous foundation with:
- Cream blush
- Liquid or cream bronzer/contour
- Liquid or cream highlighter
These textures melt into your base instead of sitting on top, keeping everything cohesive and skin‑like.
Where to Place Highlighter for a Real‑Skin Effect
Apply a liquid or cream highlighter sparingly to:
- Tops of cheekbones
- Brow bones
- Bridge (not tip) of the nose
- Cupid’s bow
- A touch on the chin or center of the forehead if your skin is dry
Blend thoroughly with a fingertip or sponge. You want a subtle sheen, not a harsh metallic stripe.
Step 7: Lock It In With a Glow‑Friendly Setting Spray
A well‑chosen setting spray can:
- Melt powders into your luminous foundation for a more seamless look
- Extend wear time
- Enhance the dewy finish
How to Use Setting Spray for Maximum Radiance
- Hold the bottle at arm’s length.
- Spray in an “X” and “T” formation over the face.
- For extra dew, lightly press a damp sponge over the skin after spraying.
Look for phrases like “dewy finish,” “glow,” or “radiance” on the label—but if you’re oily, choose one that promises “natural” instead of “ultra‑dewy.”
Extra Luminous Foundation Hacks for Different Concerns
If You Have Texture or Large Pores
- Use a smoothing, pore‑filling primer specifically in textured areas.
- Apply less luminous foundation directly over these zones.
- Avoid heavy shimmer highlighters over pronounced texture; opt for subtle sheens instead.
This keeps the focus on glow, not on pores or bumps.
If Your Foundation Separates or Gets Patchy
- Make sure your skincare and primer are compatible (water‑ vs silicone‑based).
- Allow each skincare layer to absorb fully before applying foundation.
- Use tapping motions with a sponge or brush rather than aggressive swiping.
If Your Glow Turns Greasy by Midday
- Blot with blotting papers instead of layering more powder.
- Refresh with a light mist, then tap with a sponge to revive the finish.
- Try a more long‑wear or semi‑luminous foundation formula if your current one consistently breaks down.
Simple Luminous Foundation Routine (Step‑by‑Step)
Use this as a quick checklist:
- Cleanse and apply skincare suited to your skin type.
- Apply hydrating or smoothing primer (or both, strategically).
- Dot luminous foundation on the center of your face.
- Blend outward with a damp sponge or brush in thin layers.
- Spot‑conceal where needed.
- Set only key areas with a fine translucent powder.
- Add cream blush/bronzer and a subtle highlighter.
- Finish with a glow‑friendly setting spray.
Following this structure helps you consistently achieve a dewy, flawless finish without guesswork.
FAQ: Luminous Foundation, Dewy Finishes, and Glowing Skin
Q1: Can oily skin use luminous foundation without looking shiny?
Yes, but focus on balance. Choose a natural or soft‑glow formula, prep with a mattifying primer on the T‑zone, and use very thin layers. Set the center of the face with powder and leave high points slightly bare. The result is controlled glow instead of all‑over shine.
Q2: What’s the difference between dewy foundation and luminous foundation?
“Dewy foundation” usually suggests a wetter, more hydrated, sometimes glossy finish, while luminous foundation is more about light reflection and soft radiance. Luminous finishes can range from subtle to strong, but they’re often a bit more flexible and wearable across skin types.
Q3: How do I make matte foundation look luminous?
Mix a drop of liquid highlighter or a hydrating primer into your matte formula, or apply a sheer layer of illuminating primer underneath. Then add cream highlighter and blush on top. This “hacks” your existing product into a more luminous foundation finish without buying a new one.
Harnessing the power of luminous foundation is less about chasing the newest product and more about technique: smart skin prep, strategic placement, thin layers, and thoughtful setting. With these hacks, you can create instantly dewy, flawless‑looking skin that still looks like you—just better.
If you’re ready to upgrade your everyday base, start experimenting with one or two of these tips in your current routine. Then, as you see what flatters your skin most, refine your choices in primer, luminous foundation, and setting products. Your most radiant, camera‑ready complexion is just a few tweaks away—so grab your favorite foundation and start glowing.
For More Visit Us : Hypeladies - Empowering Lifestyle Advice

Comments
Post a Comment